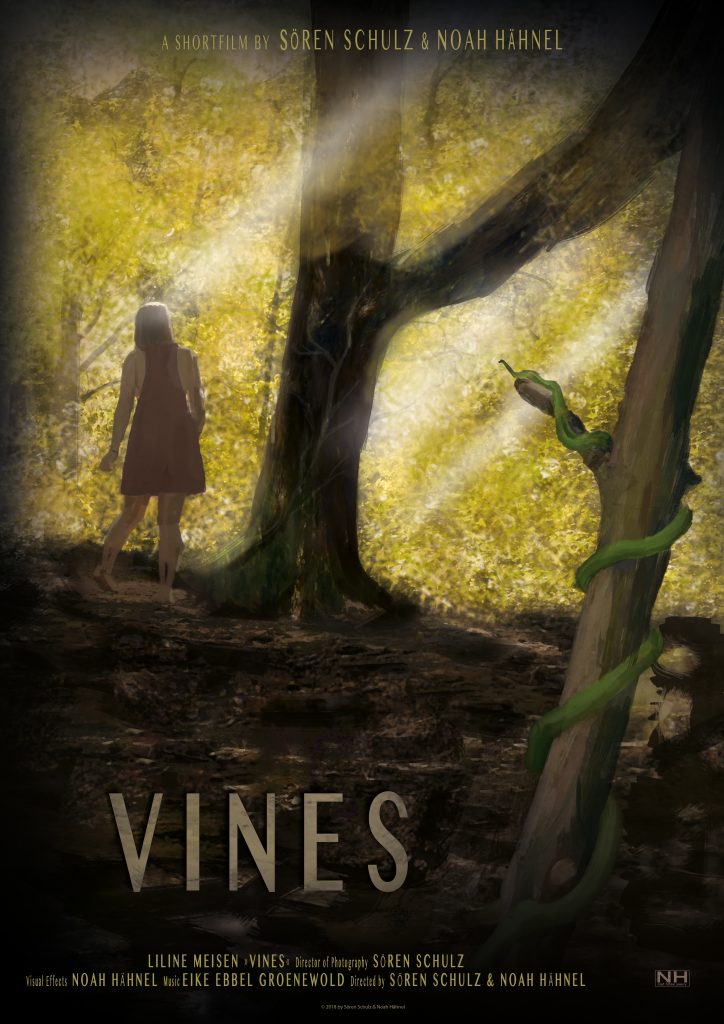
When I started planning the cost-efficient promotional Short Film VINES together with 3D-Artist/Filmmaker Noah Hähnel, we did not anticipate that it would take almost a year to finish it. Below you can watch our short film, a short Making-of Video and read about Pre Production and Filming. A post about Post Production and one about the VFX work will follow the coming weeks.
Watch this video on YouTube | Watch this video on Vimeo
Noah developed the idea to create a fairytale-like companion short film for his jewelry collection “Nature” in 2015 while designing the first pieces of the collection.
At the start of 2017, we decided to shoot the same summer and began work on the concept. We had a similar vision of what we wanted a fairytale to look like and quickly finished a script. The only challenge was, it could not cost much.
Preproduction
From the beginning, we knew the VFX would prove to be a major challenge. First, we had to make sure that we were able to realize all of the VFX ourselves in Maxon Cinema 4D (C4D). We decided to create a little test, in which a CG-vine starts growing over a roll of paper towels, with a moving camera (you can watch this test here). At this point in time, the whole CG-Setup was very simple: The vine only consisted out of several cylinders that were animated through effectors along a spline. That was our technical base for the upcoming month.
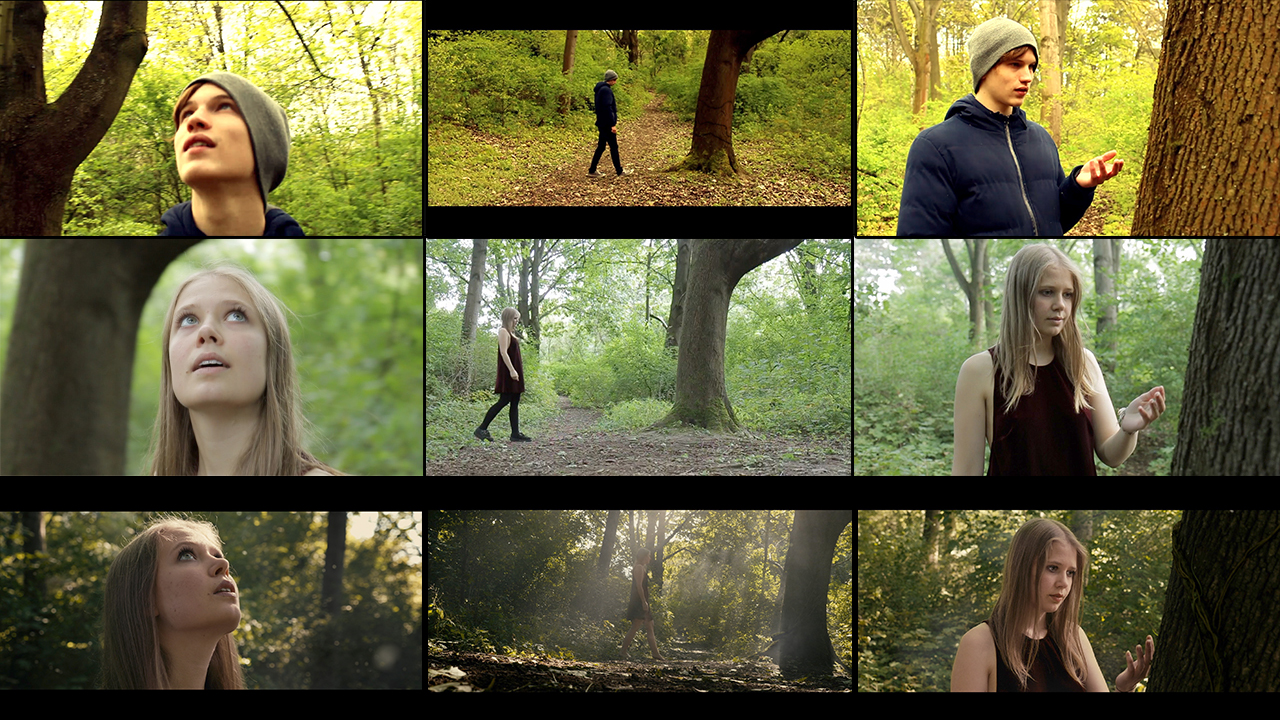
Next, we scouted locations and found a fitting place in a nearby park. There we shot another test, without actors or equipment, but already using the shots and angles we had in mind. This film became our PreViz. Furthermore, we used it to further experiment with our CGI Vines. Here are some excerpts from our test:
Click here to watch this test on Youtube
Once actress Liline Meisen was onboard we decided to shoot another test. This final test served as a rehearsal for our actress as well as make-up and costume test. After finalizing script and shot list, deciding what gear to use and finding a date, we were ready to go into production.
Production
We had one day to shoot VINES. Shooting time was further decreased by the position of the sun which was best between 10 am and 4 pm.
We chose the Panasonic GH5 as our camera as it had the most cinematic feel in our opinion among all affordable small cameras.
We captured in Full HD 50p (for subtle slow motion) in 422 10 Bit in the V-Log Colour Profile. Unfortunately, 4K was not an option since it was not available in 422 10 Bit 50p and we wanted the 10bit for VFX work.
As a lens, we solely used the Lumix 12-35mm f2.8.
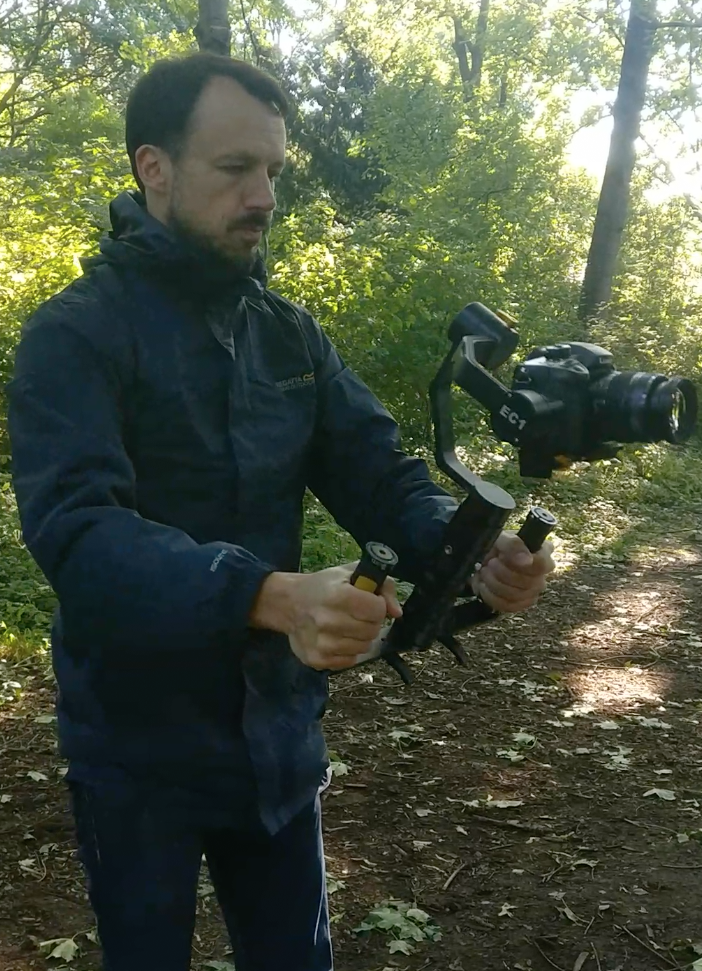
Because we wanted to keep the camera moving in all of our shots, we shot everything on a gimbal. That also eliminated re-rigging times for the camera. We decided to use the IKAN Beholder EC1 (watch our test of the Beholder EC1 here). We even managed to fake a crane shot with it by mounting it at the end of a pole.
 Lighting set-ups were kept simple: we utilized bounce boards for fill and negative fill to shape the natural light. We enhanced the fairytale-look and made the sun rays visible by adding haze to the scene. Because we were not able to power an electric hazer on location and battery-powered hazers were either too expensive or did not have a satisfying runtime, we decided to use Atmosphere Aerosol (“Haze In A Can”). You can read about our experience using Atmosphere Aerosol on this production here soon. Later in post, we would add some digital haze as well. You can read about that in part 3 of our Making-Of.
Thanks to our thorough preparation and our two test shoots, we managed to get all the shots we needed – despite the common problems like lost pedestrians in the background, clouds blocking the sun or gusts of wind that made hazing difficult.
For shots that involved VFX, we took some more time to note focal length, f-stop, and camera position. For the shot where a vine grows over our actress’ shoulder, we added tracking markers to her shoulder. These were made out of tape, so we could remove them after the take without leaving traces.
After wrapping we secured all the data and went straight to the cutting room to make a first rough cut in order to check if we had everything we needed.
Come back soon to read part two of our Making-Of VINES to find out about postproduction.
Click here for part 2: Editing, Colour Grading and Sound
Click here to read about our first VFX test for VINES
Click here to read about our autofocus test on the GH5 for VINES
Click here to read about our Ikan Beholder EC1 Gimbal Test for VINES
Click here to visit the VFX-Blog of VFX-Supervisor Noah Hähnel
Click here to see some 3D-printed jewelry by Noah Hähnel
A gallery of stills in better quality:


[…] To create a commercial for 3D printed jewelry, I am collaborating with 3D artist/filmmaker Noah Hähnel to showcase his jewelry in a fairy-tale-like fashion. The jewelry is designed in Cinema 4D (C4D) and printed into different materials. In the commercial vines are magically coming to life and eventually turn into jewelry. (Update: you can watch the finished film here). […]
[…] already covered preproduction and filming of VINES in part 1 of our Making-Of. In this part, you can read about our postproduction process including editing, colour grading and […]
[…] part one and two of our Making-of VINES series (you can read part 1 here) we already talked about filming and some aspects of postproduction. This blog post will cover […]
[…] just shot a small Jewelry commercial (you can watch it here or at the end of this article) for which we chose the Panasonic GH5 (why we chose that camera I will […]
[…] already talked about using Atmosphere Aerosol for our promotional short film Vines in a recent blog post. Nevertheless, we wanted to share more insights on using and buying it in Europe/Germany. We […]